Post Publication Review / Post Publication Scrutiny application
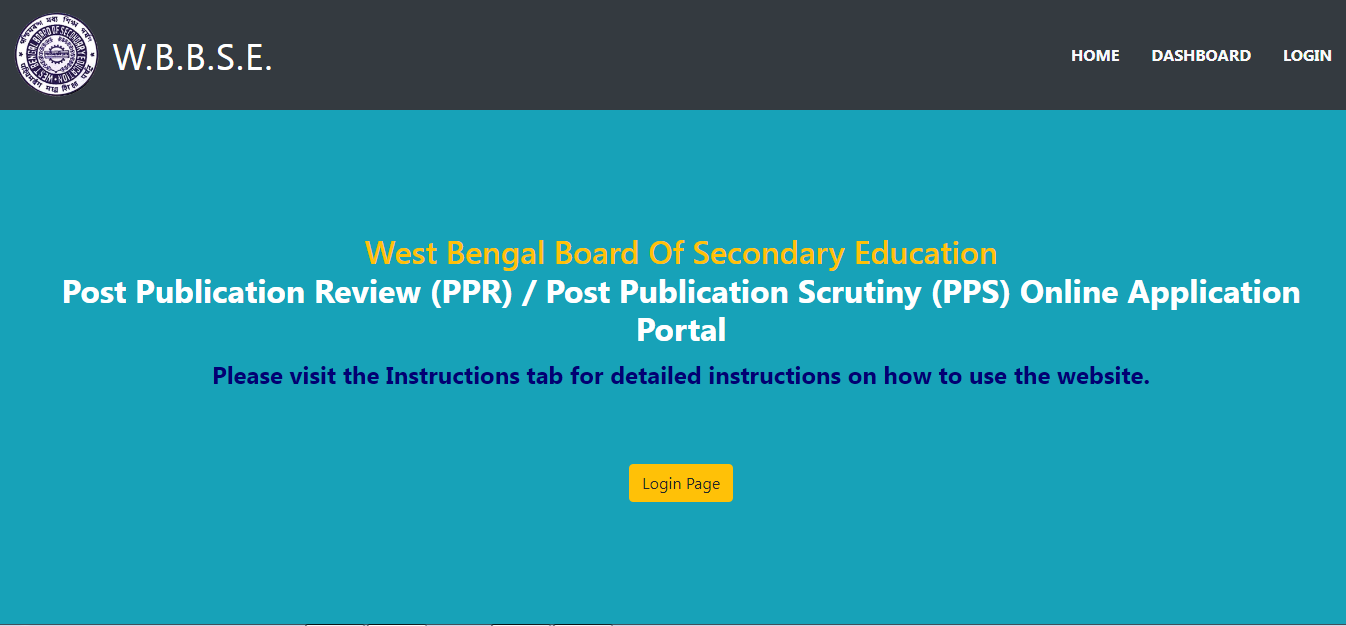
Step 1
Go to the URL: https://www.wbbsedata.com to access the Post Publication Review / Post Publication Scrutiny application portal.
Step 2
Once you get the Home page, click on the Login Page to login into your school dashboard.
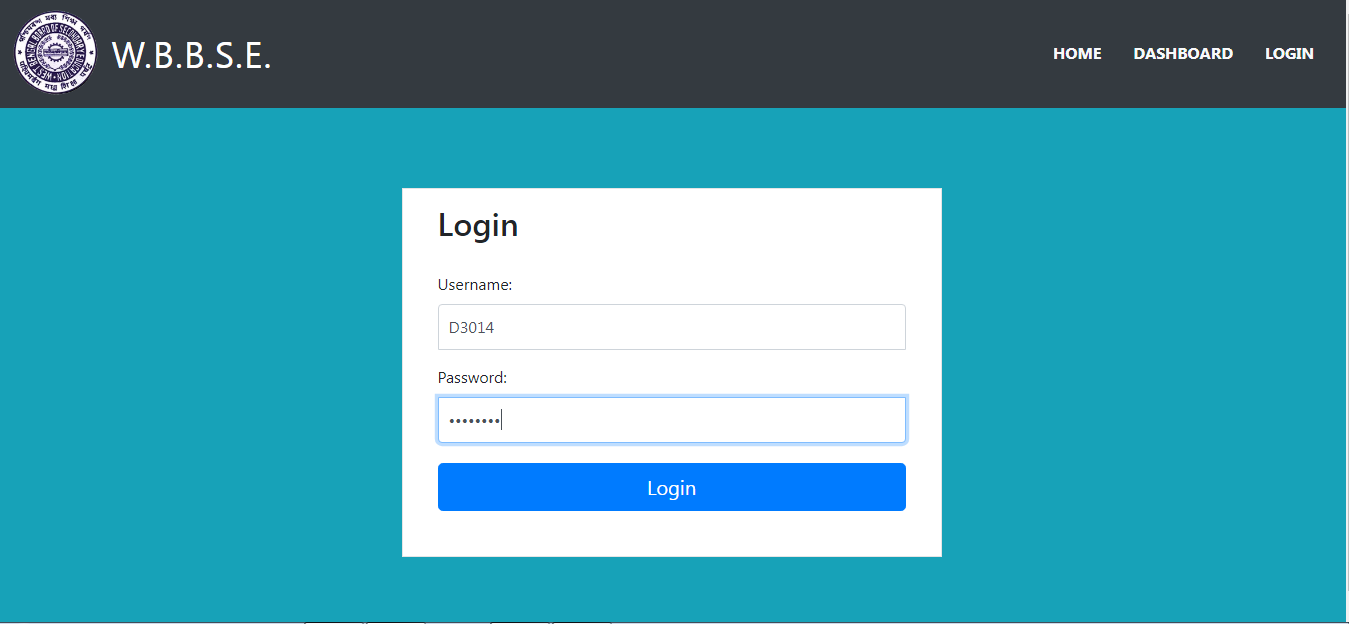
Step 3
On this page, in the username field please enter your school Index where the alpha would be in capital letter and the index would be without any hyphen or spaces. (for example - “D3014”). In the password field enter the default password as “password” all in small letters without any spaces and click on the login button. When you are logging in for the 1 st time this would redirect you to the school profile page.
Step 4
On this page please enter the details as required i.e. the HM's name or the Teacher in charge's name, email address and mobile number. If the Board finds any anomaly in the school profile data, the board can call the school authorities for further clarification. On filling up the data, click on the save button which would redirect you to the reset password page.
User profile page : (only for the 1st time login )

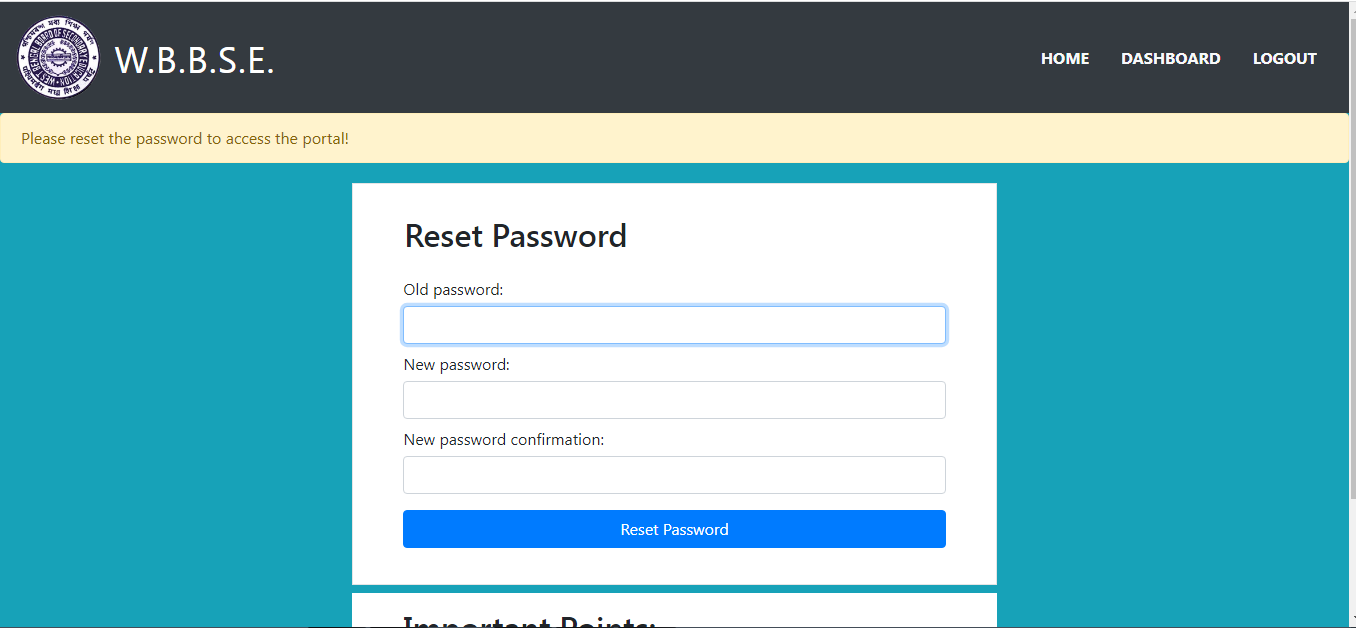
On this page please enter, the old password provided i.e. “password” which was provided to you and in the next fields enter your new password. The new password should be a combination of alpha-numeric characters and should be at least 8 characters. Now click on the reset password button. This new password would be used from next login. On clicking the reset password, this would redirect you to your school dashboard.
Change password : (only for the 1st time login )
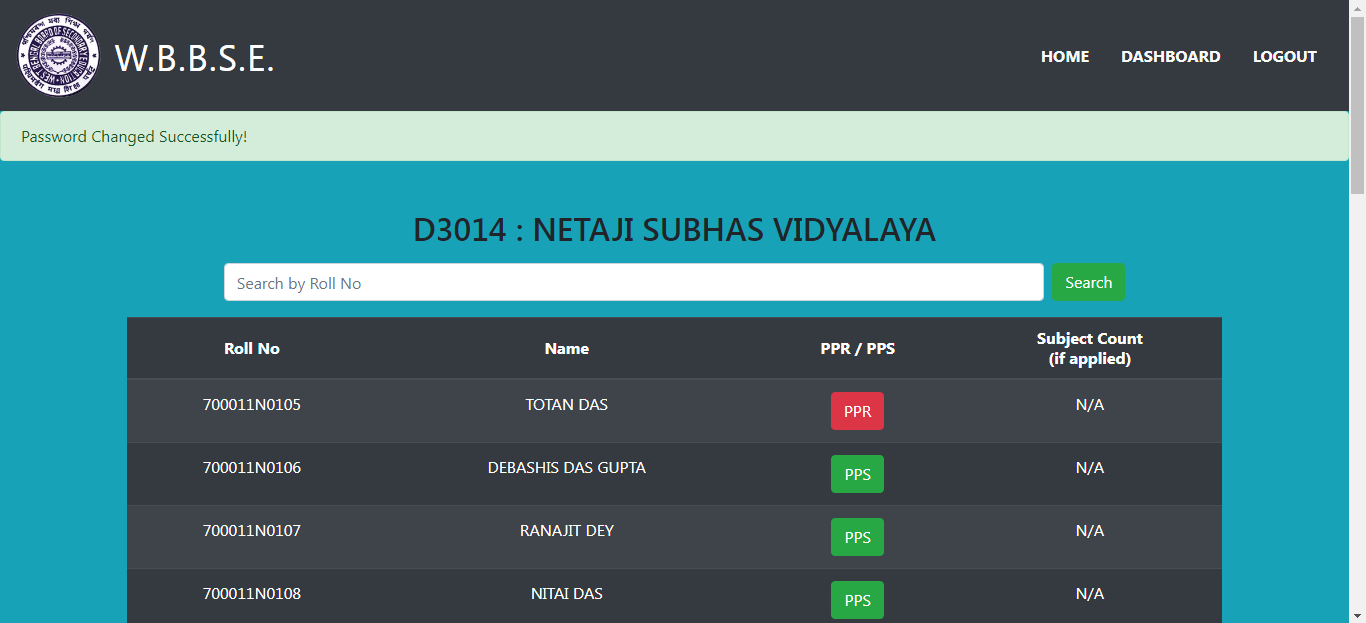
Step 5
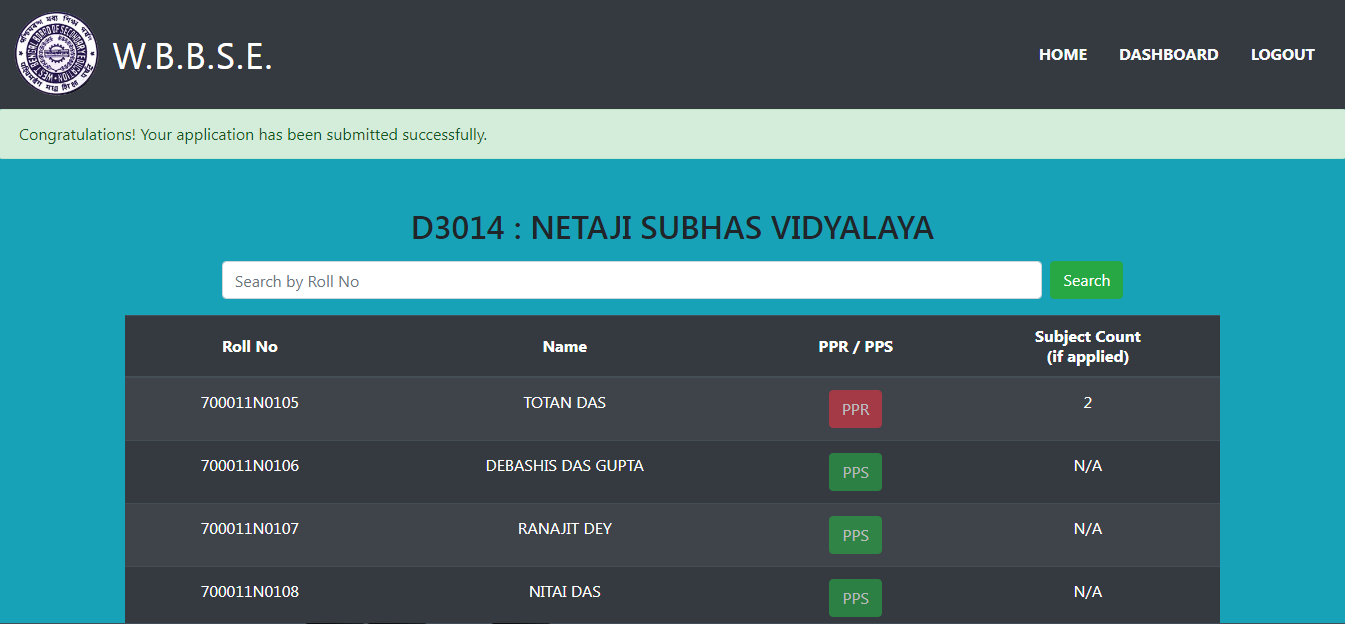
The dashboard shows a list of candidates of your school who have appeared for MP(SE)'2025 with their roll numbers and name and if they have passed then a PPS button is shown else a PPR button is shown. On clicking the PPR/PPS button the detailed page of the candidate opens up for subject selection.
The candidates can be searched through the search bar given on top by entering the rollno where the “N” in the rollno number would be in capital and the entire roll number would be without any spaces or any special characters.
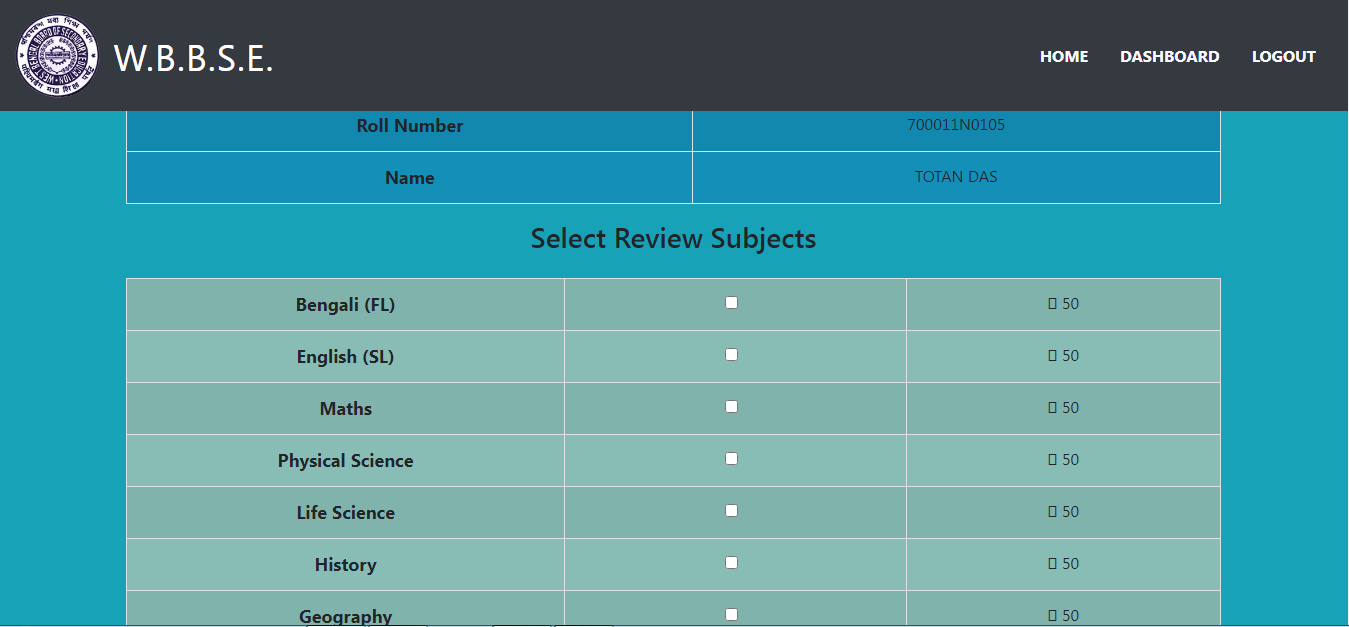
Step 6
Now as stated above on clicking the PPR/PPS button the student detail page opens up.
Here to select the subject, you have to click on the check boxes corresponding to the subject, and a tick mark appears on clicking. If by mistake a wrong subject has been selected, then by clicking again on the check box the tick mark goes off.
After selecting the subjects, click on the "Submit" button.
Step 7
After all the PPR/PPS applications are made for the required candidates, click on the submit final data button at the bottom of the dashboard page.
On clicking the final submit button all the data would be locked and no further changes can be made. So recheck your data before the final submission.
On clicking the submit final data button , you are redirected to the school summary page.

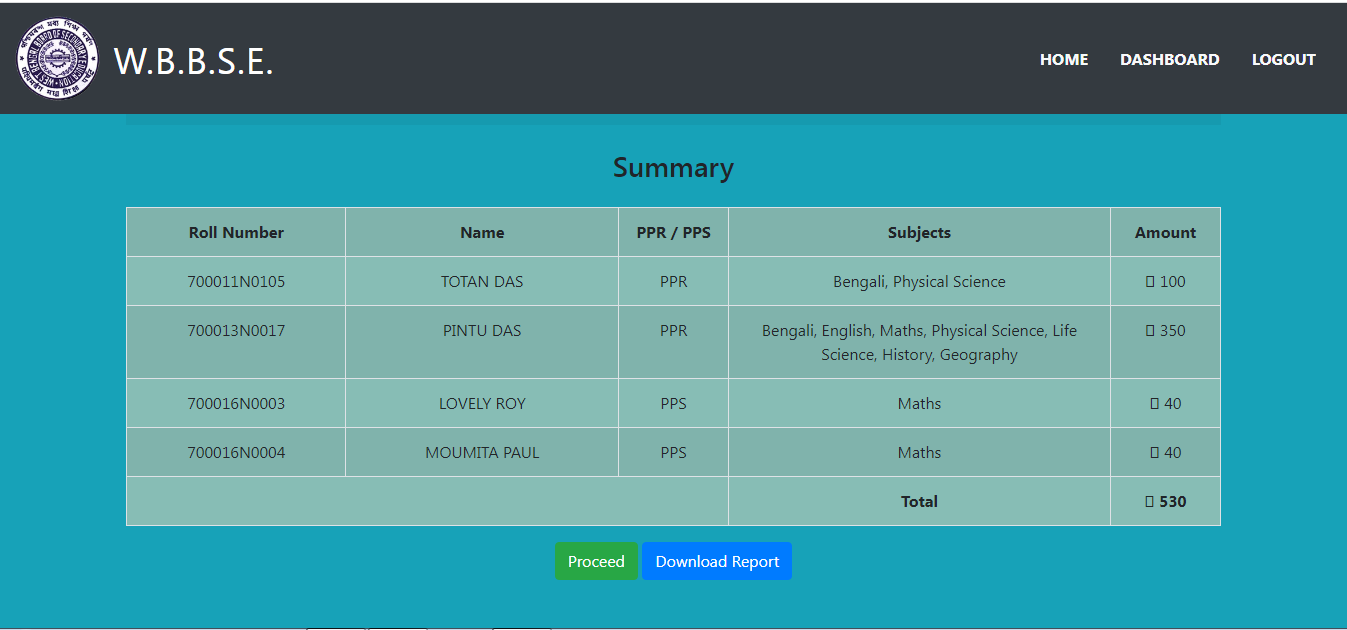
Step 8
Here all the PPR/PPS applications are shown along with the amount. Below that you find a Download Report button. On clicking this a summarized report for the school is generated in a pdf for your record.
Now click on the "Proceed" button to download challan.
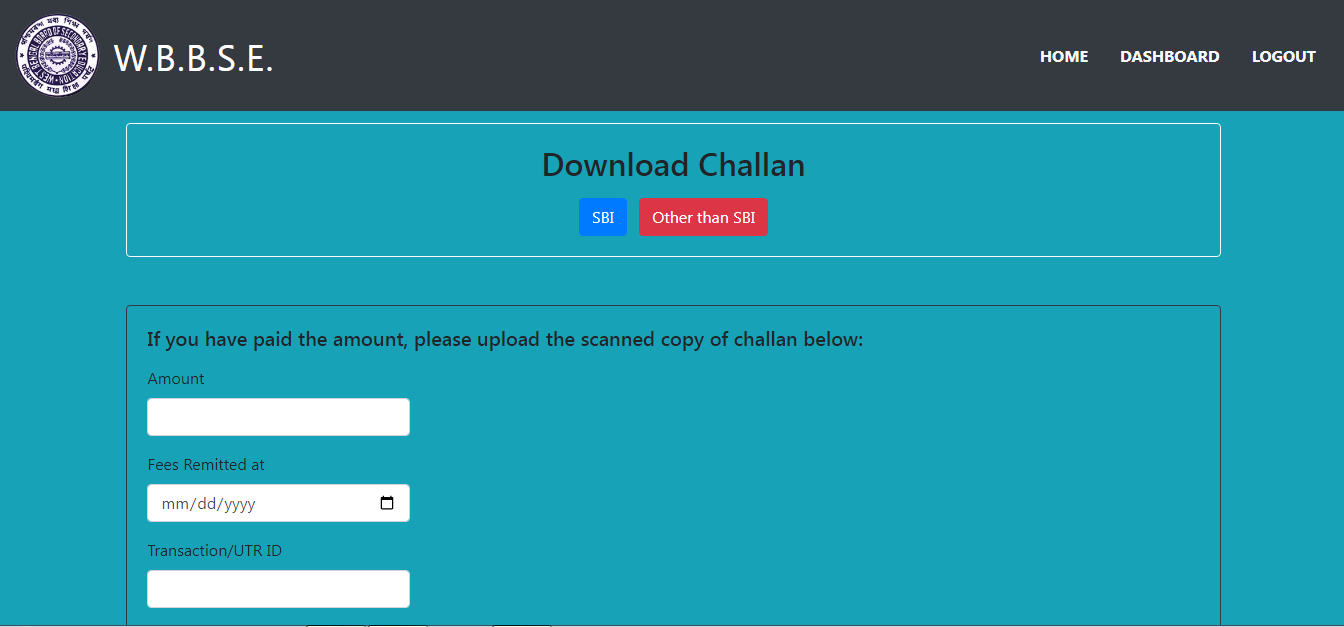
Step 9
Here at the top of the page there is a section to download PPR/PPS Apllication fees payment challan. Out of the two buttons, One is "SBI", if you want to deposit fees in any SBI branch and second is "Other than SBI" if you want to deposit fees in any bank other than SBI. On clicking the button a corrsponding challan is downloaded. Print the challan and deposit the fees in a bank of your choice.
After the deposit is made, scan the "Stamped Challan" in PDF or JPEG format and the size of the file should not be more than 200KB.
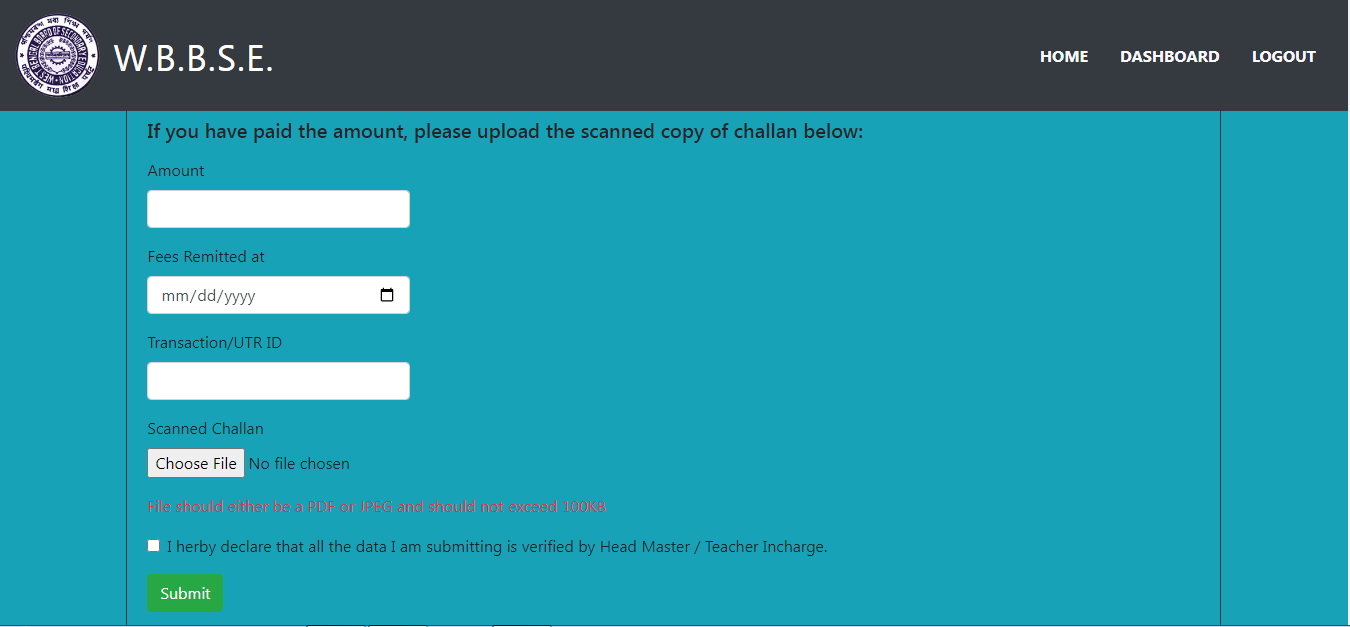
Step 10
Once you are ready with the scanned challan, in the lower section on the same page enter the Deposited Amount, Date of deposit, and the correct Transaction / UTR ID provided by the bank, select the scanned copy of the challan to be uploaded by clicking the Choose File button. Now click on the checkbox below and press the submit button. Once you press this submit button, your final submission is completed and you are redirected to the dashboard which shows a success message.
Step 11
N.B. once the summary of the school is generated, the data cannot be changed any further. No more changes are allowed.
Special Instructions
- No Application would be accepted after 18th May, 2025.
- In case you forget the password, contact the Board authorities for a password reset.
- Without proper uploaded challan and the transaction id, the application for the school would not be accepted.